How to Draw Blood: The Ultimate Guide

Phlebotomy is the official name for blood draws (sometimes called venipuncture). Drawing blood usually isn’t taught in nursing school—more on why below—but it’s a critical skill for all types of nurses to learn. In this ultimate guide, we answer some of the most frequently asked questions about phlebotomy, including why nurses draw blood, how to learn to draw blood and what clinical supplies you need. Then, we’ll walk you through the process for drawing blood like a pro before wrapping up with the history of blood drawing.
Why do nurses draw blood?
Blood samples are used to run numerous clinical tests. Some of the most common blood tests include a complete blood count (CBC) test, blood chemistry tests, blood enzyme tests and blood tests to assess heart disease risk. Blood tests measure critical variables such as red and white blood cells, platelets, hemoglobin, blood glucose, calcium, electrolytes, cholesterol and more. Blood tests are used to confirm diagnoses and determine a patient’s risk of developing certain diseases. For example, blood tests are very instrumental in confirming heart disease and diabetes–two very common conditions.

How do you learn to draw blood?
While many hospitals have phlebotomy teams that specialize in blood draws, it’s still a critical skill to have in case of an emergency. Most nursing schools don’t teach phlebotomy due to liability issues, although some organizations do offer standalone courses that you can take for a separate fee. Unfortunately, there’s really not a good way to practice drawing blood except on a live patient (at least until technological advancements result in a reasonably realistic model). Reading articles like this one, watching tutorial videos and observing experienced nurses do blood draws are all important resources that can help new nurses learn to do blood draws. The World Health Organization (WHO) also offers a 125-page guide on the best practices for blood draws if you’re really interested in learning more about the entire process.
What supplies do you need to draw blood?
Some hospitals offer blood draw kits that contain everything you need to perform a blood draw. However, it’s a good idea to know all of the phlebotomy materials you need in case you have to assemble your own or some parts of the kit are missing. It’s also a good idea to bring backups in case you need to attempt a blood draw a second time. Since this is a sterile procedure, you won’t be able to re-use certain equipment like needles in case of a second attempt.
Supplies that you need to draw blood include:
- Appropriate blood-drawing needles
- Evacuated Collection Tubes
- Blood transfer device
- Biohazard leak-proof transportation bags
- Puncture resistant sharps container
- Tourniquet
- Personal Protective Equipment (such as disposable gloves)
- Hand Sanitizer
- Alcohol swabs for skin disinfection
- Laboratory specimen labels
- Laboratory forms
- Gauze
- Adhesive bandage/tape
Please note that the type of evacuated collection tube you use will vary by the type(s) of labs ordered, since tubes differ by lab.

How do you find a vein?
Finding a vein to venipuncture is both a science and an art. Some locations are easier to stick than others, and the ease of identifying a vein will also vary from patient to patient. Some people have very large veins or veins that rest very close to the surface of their skin, making them easy to find and stick, while others have very small veins or veins that aren’t close to the surface.
For adult patients, the vein of choice is usually the median cubital vein, which runs at approximately a 45-degree angle down from the interior of the elbow joint. This vein is located in the antecubital fossa and is commonly referred to as just the antecubital or sometimes the AC. The median cubital vein is extremely large and very close to the skin’s surface, making it one of the easiest veins to find and stick. While some other veins have a tendency to roll when punctured, the antecubital usually stays steady, another reason why it’s a common site for venipuncture.
Sometime the antecubital may have already been accessed—for example, as the site of an IV line—in which case the basilic vein or the cephalic vein may be used for venipuncture instead. The basilic vein runs from the shoulder down the outside of the biceps, while the cephalic vein runs down the inside of the bicep. The median cubital vein connects the basilic vein and the cephalic vein.
There are several techniques you can use to find a vein. The most common is wrapping a tourniquet three to four inches above the vein where you want to draw blood. You can also apply a warm pack to the area, since heat helps dilate the blood vessels and makes them more visible. You should use your index or middle finger to locate the vein by feel, a technique known as palpation. (Don’t use your thumb since it has its own pulse, which will interfere with palpating.) A healthy vein will feel resilient and “bounce back” against the pressure of your hand.
How do you draw blood?
Now that you’ve got your supplies together and found a vein, it’s time to actually draw blood. Keep in mind that these are only guidelines and you should always follow your employer’s process first and foremost. There are two main ways to draw blood–using a venous stick or from a central line–but the process for inserting the needle in each case is very similar.

Here’s the step-by-step process on how to draw blood like an experienced nurse:
- Tell the patient why you need to perform the blood draw and explain the process to them.
- Identify the patient using at least two identifying criteria, as stipulated by the Joint Commission on Accreditation of Healthcare Organizations.
- Confirm the blood test(s) that have been ordered. Fill out any paperwork and labels necessary.
- Ask the patient if they have any allergies or sensitivities related to latex, adhesives, antiseptics and other materials and chemicals that will be used in the blood draw process.
- Position the patient and hyperextend their arm.
- Wash your hands thoroughly to disinfect them and then don your personal protective equipment.
- Put the tourniquet on the patient’s arm three to four inches above the selected site and double check it to make sure it isn’t too tight. Don’t leave the tourniquet on for more than two minutes at a time and watch out for concerning symptoms such as numbness, tingling, change of color to blue or white and extreme pain.
- Ask the patient to make a fist and refrain from pumping their hand. (It’s a myth that pumping the hand increases circulation, so use this as an educational moment.)
- Cleanse the area with an alcohol wipe for 30 seconds. Then, allow the site to air dry for an additional 30 seconds. Avoid waving, fanning or blowing on the area to speed up drying, as this can introduce contaminants and increase the risk of infection.
- Grab the arm firmly below the venipuncture side. This will help draw the skin taut and keep the vein from rolling.
- Insert the needle into the blood vessel at a 15- to 30-degree angle.
- At this point, blood should flash into the catheter, assuming the needle was inserted correctly. If blood doesn’t enter the catheter, either you didn’t puncture the vein or the needle went all the way through the vessel.
- Attach the tubes or syringe and remove the necessary amount of blood. As you finish drawing the last of the blood, remove the tourniquet.
- Remove the needle from the patient’s arm. Press gauze to the venipuncture site to soak up any remaining blood and protect the site.
- Properly dispose of needles and contaminated materials in the appropriate containers./li>
- Label the tubes of blood and put them into transport bags.
- Deliver the samples to the lab as soon as possible. If the blood is left out too long, hemolysis (aka the rupture of red blood cells) can set in, which will skew the lab results.
What’s the history of phlebotomy?
Thankfully, phlebotomy has come a very long way since its early beginnings thousands of years ago. Phlebotomy comes from the Greek word phlebotomia, which means “bloodletting.” In ancient civilizations such as Egypt, blood was removed from the body as part of religious ceremonies used to rid the body of evil spirits or illness.
In the fifth century, the Greeks perceived bloodletting as a purely medical process, designed to balance the four humors of the human body. Hippocrates was the first one to explain the four humors and how they worked together. If one of the four humors was considered to be in excess, it would be removed via bloodletting, purging or other similar cures. Bloodletting was often treated as something of an all-purpose cure, and was used to treat many illnesses that we now know have nothing to do with the blood.
Greek physician-philosopher Galen took things a step further when he demonstrated that arteries carried blood, not air, as it had been previously believed. He connected each of the four humors to a specific body part:
- Earth: blood, located in the brain
- Air: phlegm, located in the lungs
- Fire: black bile, located in the spleen
- Water: yellow bile, located in the gall bladder
Before the modern medical profession arose, many different laymen would perform the bloodletting procedures, including members of the church. However, Pope Alexander III prohibited clergymen from performing these bloodlettings in 1163. Given their skill with sharp objects, barbers stepped in to fill the void, becoming barber-surgeons instead. The iconic red-and-white-striped barber poles originate from this time. The red symbolizes the blood, while the white symbolizes the bandages.
During the 1700s, Pilgrims brought the practice of bloodletting over to the United States. Knives were still used for the procedure, though leeches came into fashion as well. Pints of blood would be removed from the patient until they passed out. This practice often worsened the patient’s conditions, and often had fatal consequences.
For example, after King Charles II collapsed of a seizure in 1685, his surgeons subjected him to serious bloodletting (among several other dubious treatments) which likely hastened–if not directly caused–his death. When George Washington became ill after riding around his estate in inclement weather, doctors removed multiple pints of his blood, which may have also contributed to his fast decline.
Fortunately, bloodletting fell out of fashion as modern medicine began to take shape, allowing a new practice of phlebotomy to rise. Modern blood draws use much less blood and are much less invasive than old procedures, and are usually designed to leave as much blood in the body as possible.
Learning how to draw blood can be intimidating since it’s not taught in nursing school, but it’s a valuable skill for any nurse or medical professional to learn. Do as much research ahead of time as you can and observe blood draws whenever possible. With a little practice, you’ll soon be a pro yourself.
More Articles

Scrub Color Meaning: What the Color of Your Scrubs Says About You
Discover what scrubs colors have meanings and why certain colors are associated with particular hospital departments.
Read Now

What Is a Medical Fellowship?
Discover what a medical fellowship is and how it differs from a residency. Learn what questions to ask to determine if a residency is the right choice for you.
Read Now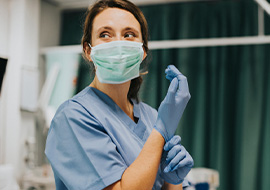
Infection Control for Healthcare Workers: 7 Ways to Avoid Bringing Germs Home from Work
Discover seven steps medical professionals can take to reduce the chances of bringing coronavirus and other infectious diseases home from the hospital.
Read Now